Track where each candidate stands
Move candidates through your stages — New through Hired — individually or in bulk, so your team shares one view.
As clinicians respond, keeping each one's stage current is what gives you — and everyone on your team — a shared picture of who's where in the pipeline.
Change a candidate's status
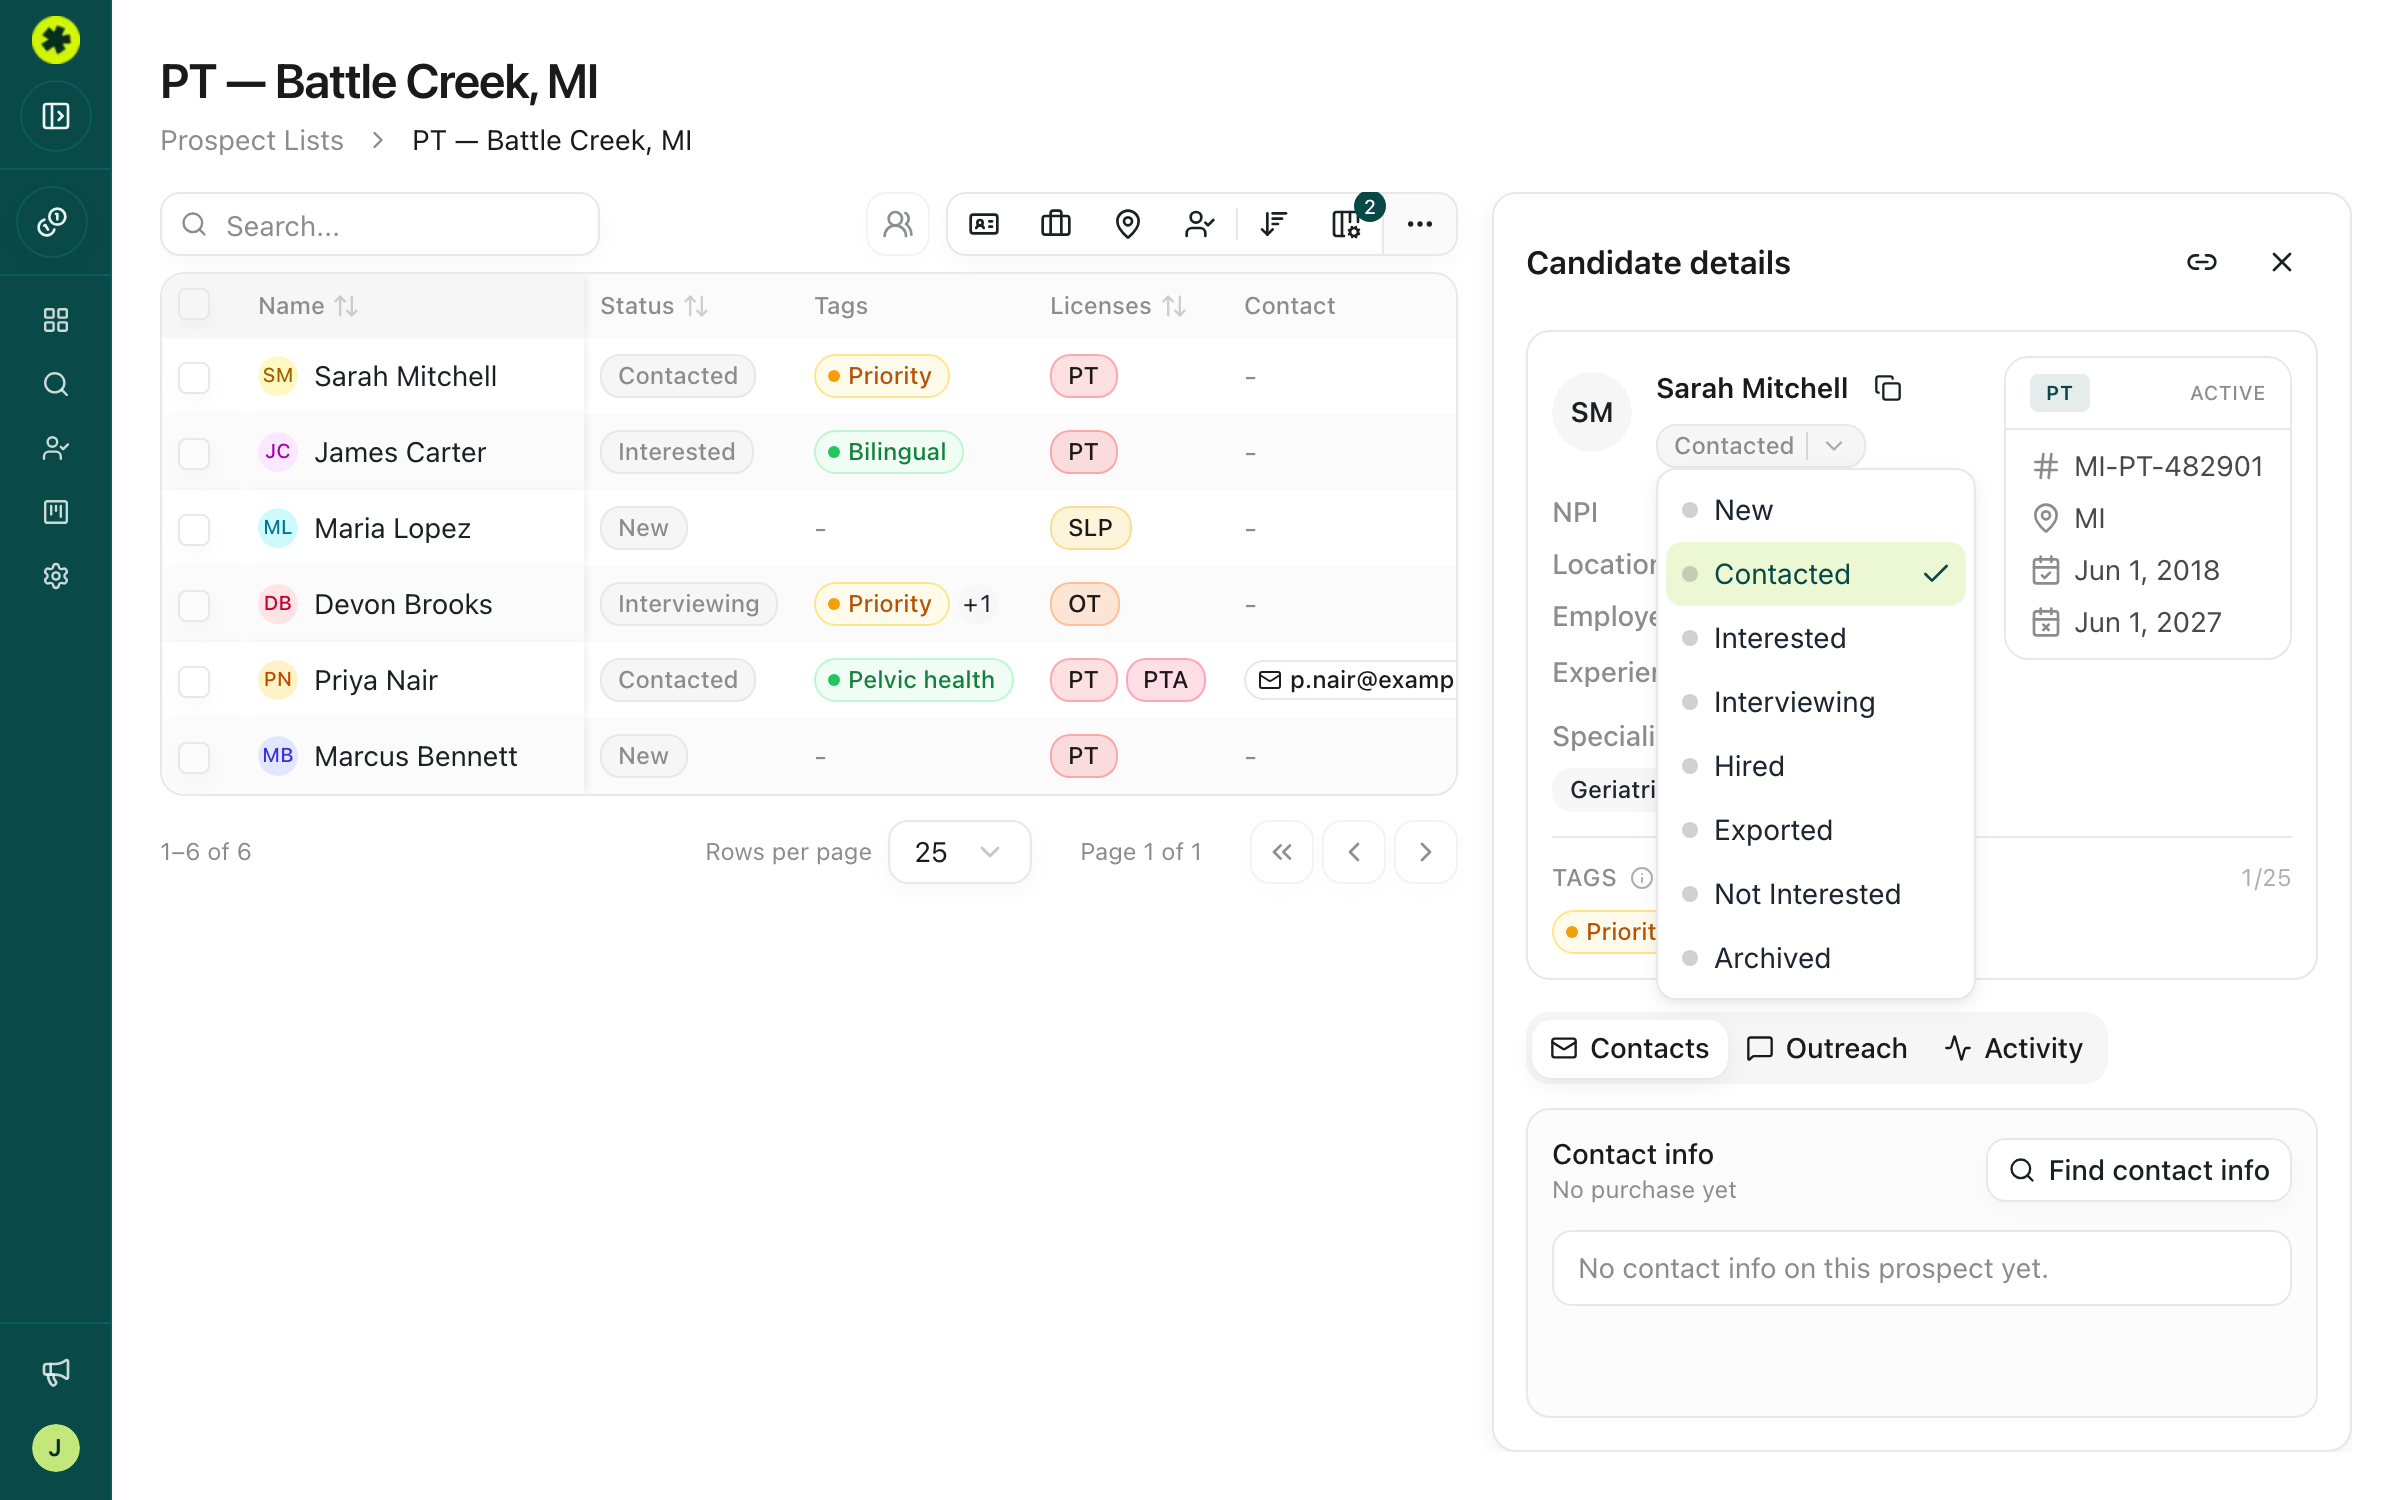
In a prospect list, click a candidate's row to open the Candidate details panel, then click the Status badge (it starts on New) and pick a stage. The change applies instantly — no save button — and both the table row and the panel update right away.
The available stages are New, Contacted, Interested, Interviewing, Hired, Exported (sent to an ATS or CSV), Not Interested, and Archived.
Update several at once
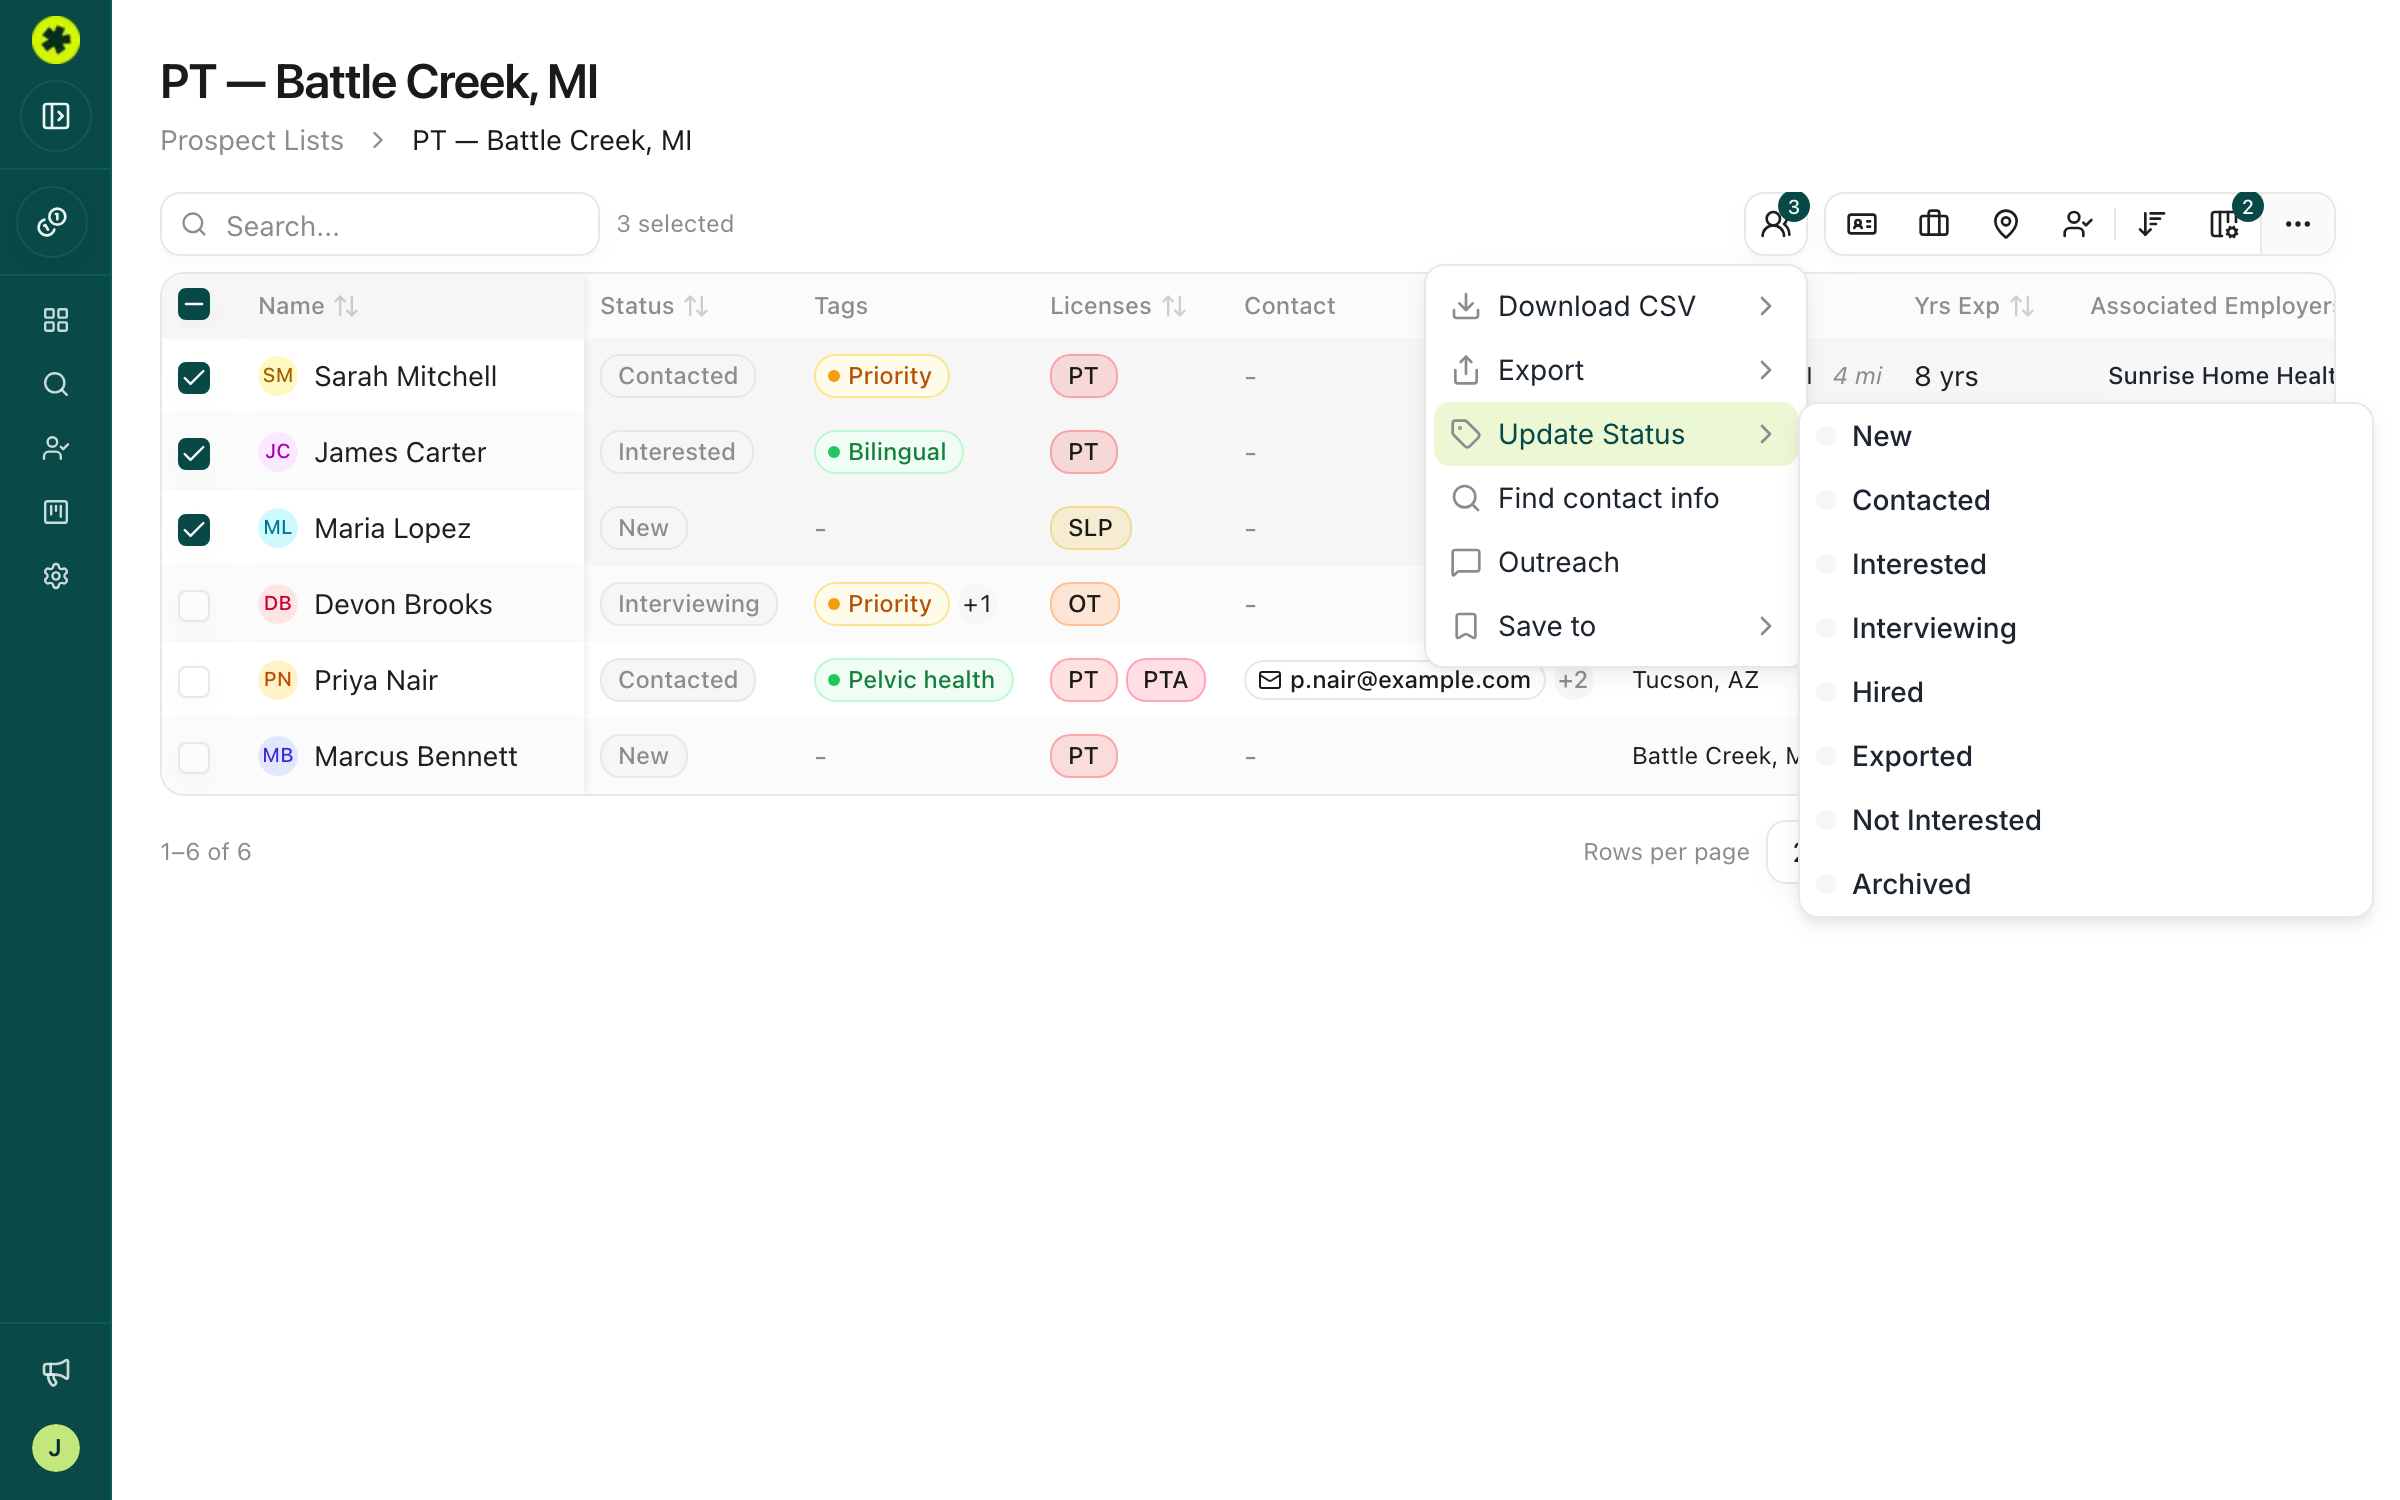
To move a group of candidates together, check their boxes in the list, click Actions in the toolbar, and choose Update Status — then pick the stage to apply to everyone you selected.
Focus on a single stage
Filter the list by Status to see just one stage at a time — for example, everyone at Interested so you know who to follow up with next.
Archiving a candidate
There's no separate hide button — set a candidate's status to Archived to drop them out of the default list view. They aren't deleted; filter the Status column to include Archived to see them again and move them back into your pipeline.
Troubleshooting
I changed a status but didn't see a Save button.
There isn't one — status changes apply the moment you pick them. You'll see the table row and the candidate panel update immediately.
A candidate disappeared from my list after I updated their status.
You likely set them to Archived, which hides them from the default view. Filter the Status column to include Archived to bring them back and change the status.
Related articles
Log your touchpoints and notes
Record calls, emails and texts with an outcome, and leave team-visible notes that follow the candidate.
Managing ProspectsKeep your lists organized and focused
Filter a list by status, tags, and contact data, tag your prospects, and rename, archive, and restore lists to keep your workspace tidy.
Managing ProspectsShare a candidate with a teammate
Copy a direct link to a specific prospect that only people in your organization can open.